>>
30-MINUTE MEALS! Get the email series now →


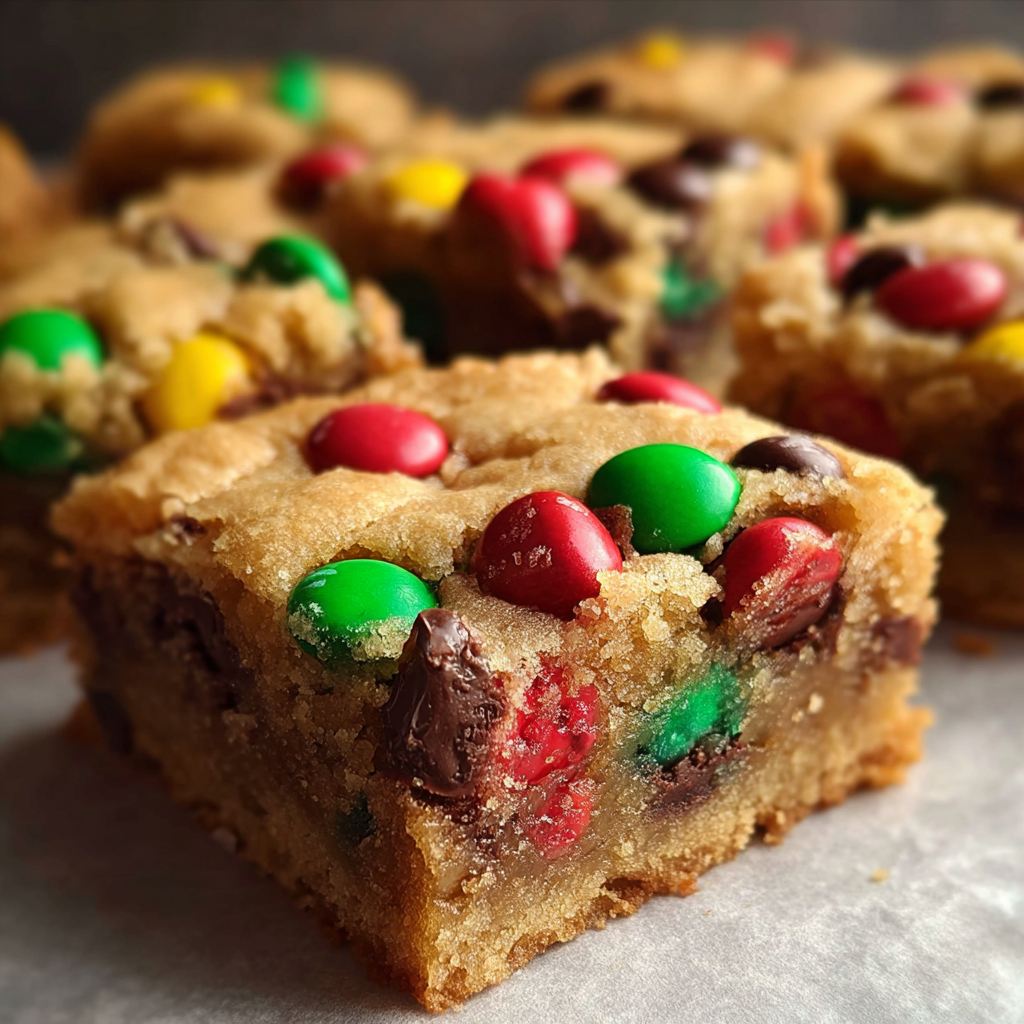
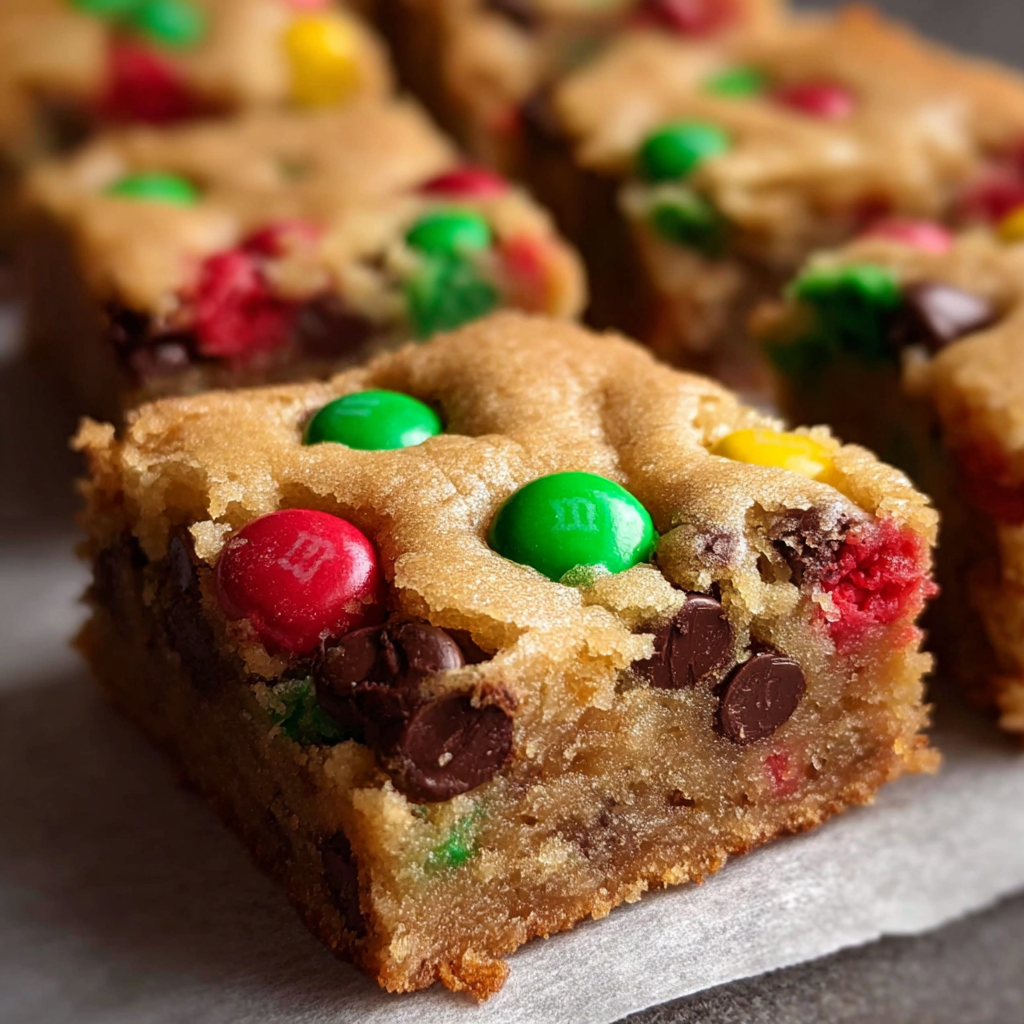
Chewy, buttery cookie bars studded with festive Christmas M&M’s and chocolate chips. A simple, crowd-pleasing holiday traybake perfect for gifting and parties.

This traybake became a holiday staple the first December I combined pantry staples with a handful of seasonal candies. I wanted something quicker than cookie-by-cookie baking yet just as indulgent. The result was a tender, slightly chewy bar with crispy edges, pockets of melting chocolate, and colorful Christmas M&M candies that make the pan look festive before anyone even tastes it. I often make a double batch for parties because these bars disappear faster than I can plate them.
I discovered the exact proportions during a hectic week of holiday baking when my oven time was limited and my kids wanted to help. This formula keeps things simple without sacrificing texture. The dough is soft and forgiving which makes the mix-and-spread method ideal for busy cooks. Once cooled, the bars slice neatly and travel well. They have the buttery density of a blondie with cookie-like flavor and are perfect with a mug of cocoa or for including in cookie boxes for neighbors.
My family always gathers around the cooling rack to sneak a warm corner piece. On more than one occasion a neighbor has stopped by with a plate and asked for the recipe because the colors and aroma made their whole house smell like the holidays. For me the best part is watching my youngest carefully press a few extra candies into the top before baking as a personal signature touch.
One of my favorite things is how the aroma of butter and brown sugar fills the house while the kids set the colorful candies into the top. I have gifted these bars to neighbors bundled with a ribbon and they always get asked for a repeat batch the next year. The simple technique produces consistent results so even novice bakers can impress a crowd.
Store cooled bars in an airtight container at room temperature for up to four days. For longer storage freeze slices individually on a sheet tray until solid then place in a freezer proof container with layers separated by parchment. Thaw overnight in the refrigerator or for a few hours at room temperature. To refresh slightly stale edges briefly warm a single piece in a 300 degree Fahrenheit oven for five to seven minutes.
You can swap half of the all purpose flour for whole wheat pastry flour for a nuttier flavor though expect a denser crumb. Use coconut sugar instead of brown sugar for subtle caramel notes and a lower glycemic option but it will change color and moisture slightly. For nut free bars omit any suggested nuts and increase chocolate chips by 1/4 cup. If you want dairy free replace butter with a firm plant based spread measured cup for cup and use dairy free chocolate chips.
Serve warm with a scoop of vanilla ice cream for a festive dessert or pack slices in parchment lined boxes for neighbor gifts. Pair with hot cocoa, mulled cider or strong coffee. Garnish plated bars with a dusting of powdered sugar or a few extra M&M pieces for presentation. Mini bars work well for cookie platters and tea parties.
Traybakes such as these are rooted in quick, communal baking traditions where efficiency meets celebration. The technique mimics classic blondies and cookie bars that became popular as convenient alternatives to drop cookies when gatherings demanded larger quantities. Adding holiday candy is a modern American twist that embraces seasonal colors and store bought decorations to create visually festive treats without elaborate decoration skills.
For winter variations swap Christmas M&M candies for peppermint pieces and add white chocolate chips for a peppermint bark inspired bar. In summer use colorful plain M&M variety and stir in toasted coconut for a tropical note. For autumn replace the M&M s with butterscotch chips and add 1 teaspoon ground cinnamon to the dry mix for a warming spice change.
The dough can be prepared a day ahead. Press into the pan and cover tightly, then refrigerate. Add reserved candies on top and bake when ready which simplifies day of serving. Alternatively scoop dough into a freezer safe container and freeze for up to one month. Thaw in the refrigerator overnight then bake a few extra minutes to reach the same golden edge.
These bars are a reliable, flavor forward addition to holiday baking rotations. Simple technique, minimal fuss and joyful color make them a repeat winner when you need a crowd pleasing traybake that travels and gifts with ease. Make a batch, share with friends and refine your personal tweaks to make them truly yours.
Measure flour by spooning into measuring cups and leveling to avoid dense bars.
Allow bars to cool completely before slicing for clean edges; chilling briefly helps.
Reserve some M&M candies to press on top so the bars look festive straight from the oven.
Use parchment overhang to lift bars from the pan for neat slicing and easy storage.
This nourishing christmas m&m cookie bars recipe is sure to be a staple in your kitchen. Enjoy every moist, high protein slice — it is perfect for breakfast or as a wholesome snack any time.
This Christmas M&M Cookie Bars recipe makes perfectly juicy, tender, and flavorful steak every time! Serve with potatoes and a side salad for an unforgettable dinner in under 30 minutes.
Preheat oven to 350 degrees Fahrenheit and line a 9 by 13 inch pan with parchment leaving an overhang for easy removal.
Beat softened butter with brown sugar and granulated sugar until pale and slightly fluffy for about two to three minutes to incorporate air.
Add eggs one at a time mixing until incorporated then mix in vanilla. Scrape the bowl to ensure even distribution.
Whisk flour, baking soda and salt then add to wet ingredients in two additions mixing on low until just combined to avoid overworking the dough.
Fold in chocolate chips and most of the M&M's leaving a few to press on top for appearance.
Spread the dough into the prepared pan and press reserved candies into the surface. Bake 20 to 25 minutes until edges are golden and center is set with a few moist crumbs.
Cool completely on a wire rack, lift from the pan using parchment overhang and slice into 12 bars. Chill briefly for cleaner cuts if desired.
Last Step: Please leave a rating and comment letting us know how you liked this recipe! This helps our business to thrive and continue providing free, high-quality recipes for you.
Leave a comment & rating below or tag
@yummyhues on social media!
Thinly sliced russet potatoes brushed with butter and baked until the edges are crisp and the centers are tender.
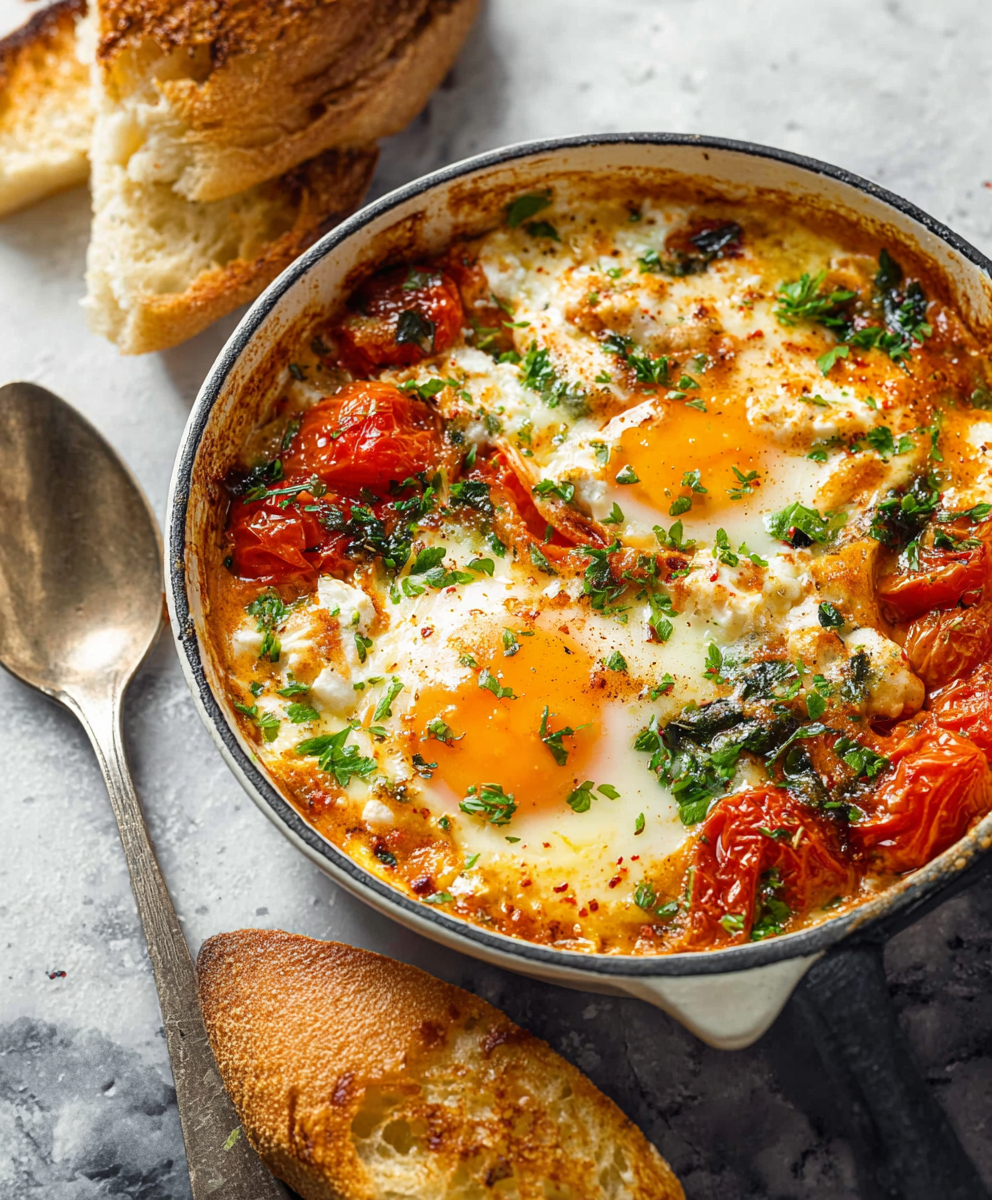
A simple, vibrant baked egg dish: tangy feta melting into roasted cherry tomatoes with spinach and fragrant herbs. Perfect for brunch or an easy dinner.
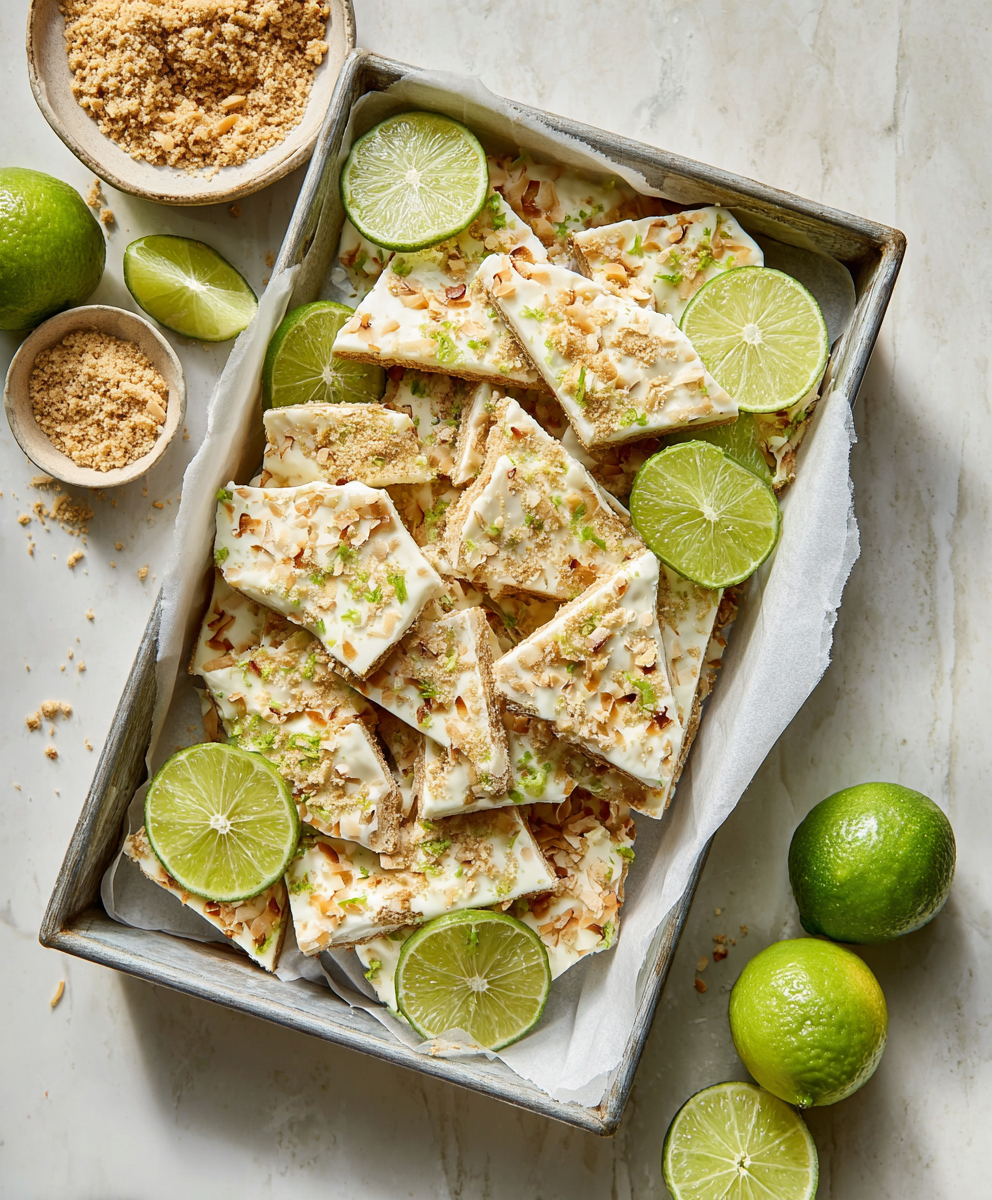
A bright, tangy frozen treat that tastes like mini key lime pies. Creamy Greek yogurt, fresh lime, crunchy gluten-free crumbs, and toasted coconut come together for a protein-packed snack.
Leave a comment & rating below or tag @yummyhues on social media!
Enjoyed this recipe? Share it with friends and family, and don't forget to leave a review!
This recipe looks amazing! Can't wait to try it.
Comments are stored locally in your browser. Server comments are displayed alongside your local comments.

Join to receive our email series which contains a round-up of some of our quick and easy family favorite recipes.