
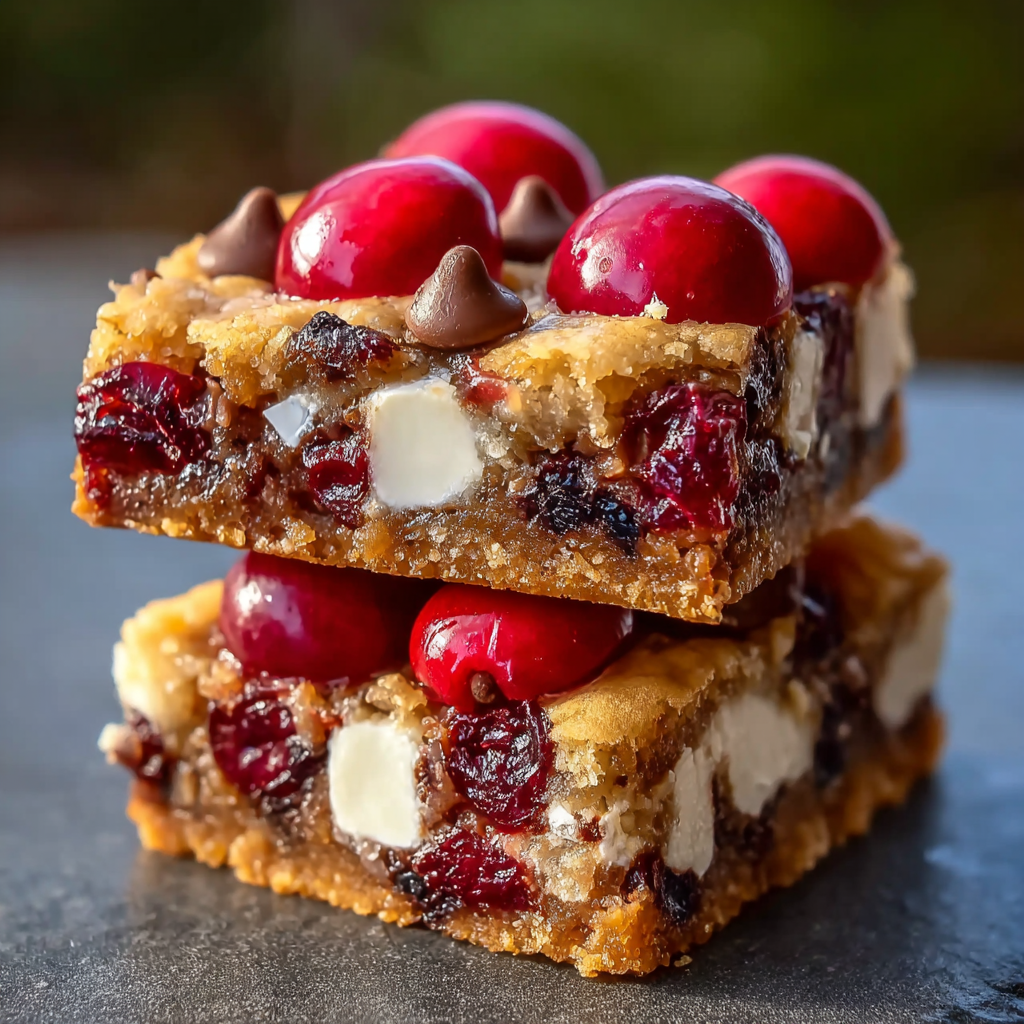
Christmas Bars

A festive, indulgent tray of layered chocolate, marshmallow, and graham base—easy to make and perfect for holiday gifting or cookie swaps.

This tray of Christmas bars is one of those recipes that appears in my kitchen every December without fail. I discovered this combination at a holiday cookie swap a few years back: someone brought a tray of gooey, chocolate-studded squares that disappeared before I had my camera ready. I recreated it the following week, tweaked the balance of crust-to-topping, and added a short bake to anchor the layers. The result is a reliable crowd-pleaser—crisp, chocolatey base that gives way to sweet condensed milk, toasted marshmallows, melting chocolate chips, and a scattering of nuts for crunch. The aroma of warm chocolate and toasted marshmallow fills the house and invites everyone to gather around the counter.
What I love about these bars is how forgiving they are. They’re simple enough for a last-minute bake yet look and taste like something you might find at a specialty bakery. They hold well for gifting, slice neatly if chilled, and adapt easily: swap the nuts, change the chocolate, or make them nut-free for school-safe treats. I often make a double batch to freeze half for hostess gifts; the texture holds up beautifully after a quick defrost in the refrigerator. For week-of-Christmas baking, these are my go-to: fast, festive, and impossible to resist.
Why You'll Love This Recipe
- Fast to assemble—ready in about 45 minutes from start to finish, with minimal active hands-on time, making it ideal for busy holiday schedules.
- Uses pantry staples (graham crumbs, sweetened condensed milk, chocolate chips) that you likely already have or can grab in one quick store run.
- Make-ahead friendly: slices keep well in the refrigerator and freeze beautifully for up to 3 months—perfect for gifting or prepping ahead.
- Highly adaptable to dietary needs: switch to dairy-free chocolate or omit nuts to accommodate guests, while keeping the same rich texture.
- Crowd-pleasing flavor profile—combines crunchy, chewy, and melty textures that satisfy both kids and adults at holiday gatherings.
- No special equipment required; a 9x13 pan, a few bowls, and an oven are all you need to create a bakery-style tray.
I remember the first time I brought these to a family gathering: my aunt asked for the recipe between bites, and an uncle declared them "the best tray of bars of the season." Over the years, I’ve learned small tweaks—pressing the crust firmly, toasting the marshmallows just until they have golden tips—and those little adjustments make a big difference in flavor and presentation.
Ingredients
- Graham cracker crumbs (2 cups): Use finely crushed crumbs for an even crust—Honey Maid or store-brand work well. You can crush whole crackers in a food processor or a resealable bag with a rolling pin.
- Unsweetened cocoa powder (1/4 cup): Adds depth and balances sweetness—Ghirardelli or Hershey's will both give you a rich base tone without adding sugar.
- Powdered sugar (1 1/2 cups): Helps bind the crumbs while keeping the texture silky; sift if clumpy to avoid pockets in the crust.
- Unsalted butter, melted (3/4 cup): Melted and slightly cooled so it incorporates smoothly; measure by volume for consistency. This creates a crisp, holding base.
- Sweetened condensed milk (1 can, 14 oz): The glue of the topping—use the full-fat variety for best creaminess and gloss. It caramelizes lightly during baking and binds the marshmallows and chocolate.
- Mini marshmallows (3 cups): Jet-Puffed or equivalent—mini work best because they distribute evenly; reserve a few for the top for a prettier finish.
- Chocolate chips (1 1/2 cups): Semi-sweet chips (Nestle Toll House or Ghirardelli) give a pleasant contrast; you can also use a mix of dark and milk for complexity.
- Chopped nuts (1/2 cup, optional): Toasted pecans or walnuts add crunch and a toasty flavor—omit for nut-free versions.
Instructions
Prepare the pan and preheat: Preheat your oven to 350°F. Line a 9x13-inch pan with parchment overhanging two sides; this makes it easy to lift the set bars out later. Lightly grease the parchment to prevent sticking. Make the base mixture: In a large bowl, combine 2 cups graham cracker crumbs, 1/4 cup unsweetened cocoa powder, and 1 1/2 cups powdered sugar. Pour in 3/4 cup melted unsalted butter and stir until the mixture resembles wet sand and holds together when pressed. Press and blind bake: Transfer the crumb mixture to the prepared pan and press firmly and evenly into an even layer using the bottom of a measuring cup or a flat spatula. Bake for 8 minutes to set the base—this prevents sogginess once the topping is added. Let it cool just slightly while you prepare the topping. Assemble the topping: Pour the 14-ounce can of sweetened condensed milk evenly over the warm crust. Sprinkle 3 cups mini marshmallows across the surface, then evenly distribute 1 1/2 cups chocolate chips and the optional 1/2 cup chopped nuts. Tuck a few extra marshmallows and chips on top for a pretty finish. Bake to meld layers: Return the pan to the oven and bake for 12–14 minutes, until marshmallows are puffy and lightly golden and chips are glossy. Watch closely during the last 3 minutes to avoid over-browning; you want a little toasted color, not char. Cool and chill: Remove from the oven and let cool on a rack for 30 minutes, then refrigerate for at least 2 hours, or until fully set. Chilling makes slicing cleaner and gives the layers time to firm up. Use the parchment overhang to lift the slab from the pan and slice into squares with a sharp knife.
You Must Know
- These bars are not shelf-stable; store in the refrigerator covered for up to 5 days or freeze for up to 3 months wrapped tightly.
- They are high in sugar and should be portioned appropriately for parties; one 9x13 pan yields about 16 medium squares.
- To make nut-free treats for school events, omit the nuts and consider adding toasted coconut for texture instead.
- Chilling before slicing is key—cutting warm bars will produce messy edges; a quick run of the knife under hot water and drying between cuts helps make clean lines.
- If you prefer softer bars, skip the second bake and simply chill; the flavor will be very similar but the marshmallows won’t be toasted.
My favorite part is watching the marshmallows brown just a touch in the oven—those golden tips give the tray a festive, toasty note. My kids insist on the first taste test while the bars are still slightly warm; for guests I always wait until chilled because the slices look so much neater and the texture is perfectly set.
Storage Tips
Store the cooled and chilled squares in an airtight container in the refrigerator for up to 5 days. For longer storage, wrap individual bars in plastic wrap and place them in a freezer-safe container or bag for up to 3 months. To serve from frozen, thaw overnight in the refrigerator; for a warm bite, let them come to room temperature for 20–30 minutes or microwave a single piece for 8–10 seconds.
Ingredient Substitutions
Swap semi-sweet chips for dark chocolate for a less sweet bar or use milk chocolate for a sweeter, creamier finish. Replace the graham crumbs with crushed digestive biscuits for a slightly different flavor, or use gluten-free graham-style crumbs to make a gluten-free version (note: marshmallows and chocolate should also be gluten-free to keep the batch safe). For dairy-free versions, use dairy-free chocolate chips and a plant-based butter substitute.
Serving Suggestions
Serve squares at room temperature with a dusting of powdered sugar or a drizzle of melted chocolate for an elegant touch. These make a great addition to cookie platters, paired with coffee or hot cocoa, or boxed individually for hostess gifts. Garnish with a few extra toasted marshmallows or a sprinkle of finely chopped nuts for a festive presentation.
Cultural Background
Layered bars like these are part of a long tradition of American no-fuss holiday treats—think seven-layer bars or magic bars—which combine a simple base with sweet, layered toppings. They reflect a practical approach to festive baking: minimal technique, maximum reward. Variations can be found across regions, often adapted with local nuts or candies, but the core idea—crisp foundation with gooey, sweet top—remains a beloved holiday staple.
Seasonal Adaptations
For winter gatherings, add a teaspoon of orange zest to the crumb mixture for a festive citrus note, or stir in a pinch of cinnamon for warmth. At summer barbecues, make them with toasted coconut and white chocolate chips for a tropical twist. You can also add holiday sprinkles on top right after baking for a colorful presentation at kids' parties.
Meal Prep Tips
Make the crust and chill it the day before; assemble and bake on the day you plan to serve to keep the marshmallows fresh and slightly toasted. For busy hosts, bake two pans at once and freeze one; wrap tightly in foil and plastic, then thaw in the refrigerator the day you need it. Keep a sharp serrated knife on hand for neat slicing of chilled squares.
These bars are a joyful, adaptable part of my holiday routine—simple enough for a last-minute bake yet special enough to make people pause. I hope they become part of your seasonal repertoire too: easy to share, easy to love.
Pro Tips
Press the crust firmly and bake briefly to avoid a soggy bottom after adding the sweetened condensed milk.
Chill the slab for at least 2 hours before slicing to get clean edges and neat squares.
Watch the marshmallows closely in the oven; they can go from golden to burnt quickly—aim for lightly toasted tips.
If slicing warm, run the knife under hot water and dry it between cuts for smoother edges.
This nourishing christmas bars recipe is sure to be a staple in your kitchen. Enjoy every moist, high protein slice — it is perfect for breakfast or as a wholesome snack any time.
FAQs about Recipes
Can I freeze these bars?
Yes. They freeze well for up to 3 months wrapped tightly; thaw overnight in the refrigerator.
How long should I chill before slicing?
Chill at least 2 hours; for cleaner slices, chill longer or overnight so the topping firms completely.
Can I make these vegan?
Use dairy-free chips and plant-based butter, and confirm marshmallows are gelatin-free for a vegan-friendly version.
Tags
Christmas Bars
This Christmas Bars recipe makes perfectly juicy, tender, and flavorful steak every time! Serve with potatoes and a side salad for an unforgettable dinner in under 30 minutes.
Ingredients
Base
Topping
Instructions
Preheat and prepare pan
Preheat oven to 350°F. Line a 9x13-inch pan with parchment leaving a 2-inch overhang on two sides and lightly grease the paper.
Combine dry base ingredients
In a large bowl mix 2 cups graham crumbs, 1/4 cup cocoa powder, and 1 1/2 cups powdered sugar until evenly blended.
Add butter and press
Pour 3/4 cup melted butter into the crumb mix, stir until it holds together, then press firmly into the prepared pan to form an even base.
Blind bake base
Bake the crust for 8 minutes to set and help prevent sogginess; remove and allow to cool slightly before topping.
Assemble topping layers
Pour the 14-ounce can of sweetened condensed milk over the warm crust, sprinkle 3 cups mini marshmallows, then distribute 1 1/2 cups chocolate chips and 1/2 cup nuts on top.
Bake to meld flavors
Bake again for 12–14 minutes until marshmallows are lightly toasted and chips are glossy. Watch closely to avoid over-browning.
Cool and chill before slicing
Cool 30 minutes on a rack, then refrigerate at least 2 hours. Use parchment overhang to lift the slab and cut into 16 squares with a sharp knife.
Last Step: Please leave a rating and comment letting us know how you liked this recipe! This helps our business to thrive and continue providing free, high-quality recipes for you.
Nutrition
Did You Make This?
Leave a comment & rating below or tag
@yummyhues on social media!
Categories:
You might also like...
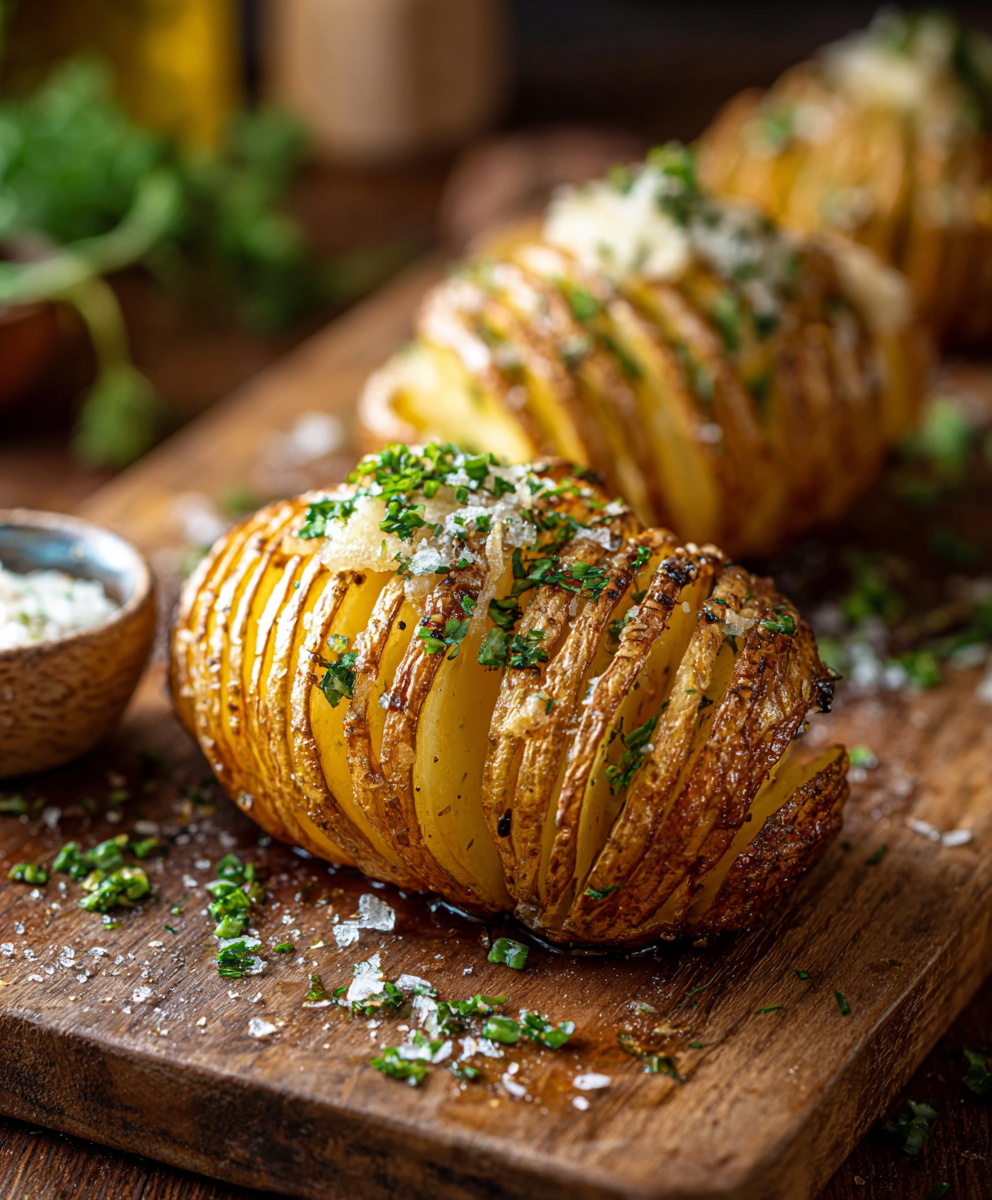
Crispy Hasselback Potatoes
Thinly sliced russet potatoes brushed with butter and baked until the edges are crisp and the centers are tender.
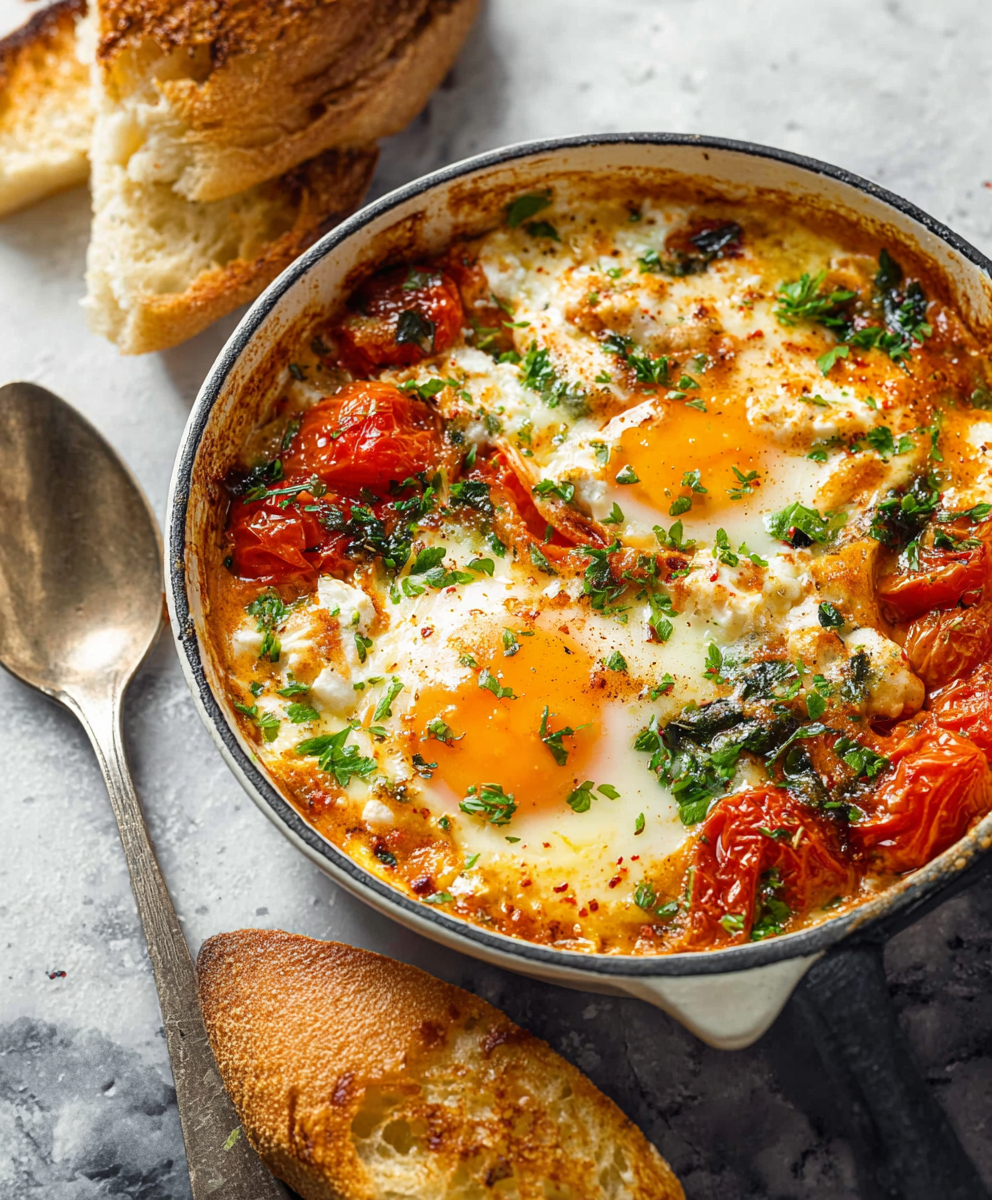
Baked Feta Eggs with Roasted Tomatoes and Spinach
A simple, vibrant baked egg dish: tangy feta melting into roasted cherry tomatoes with spinach and fragrant herbs. Perfect for brunch or an easy dinner.
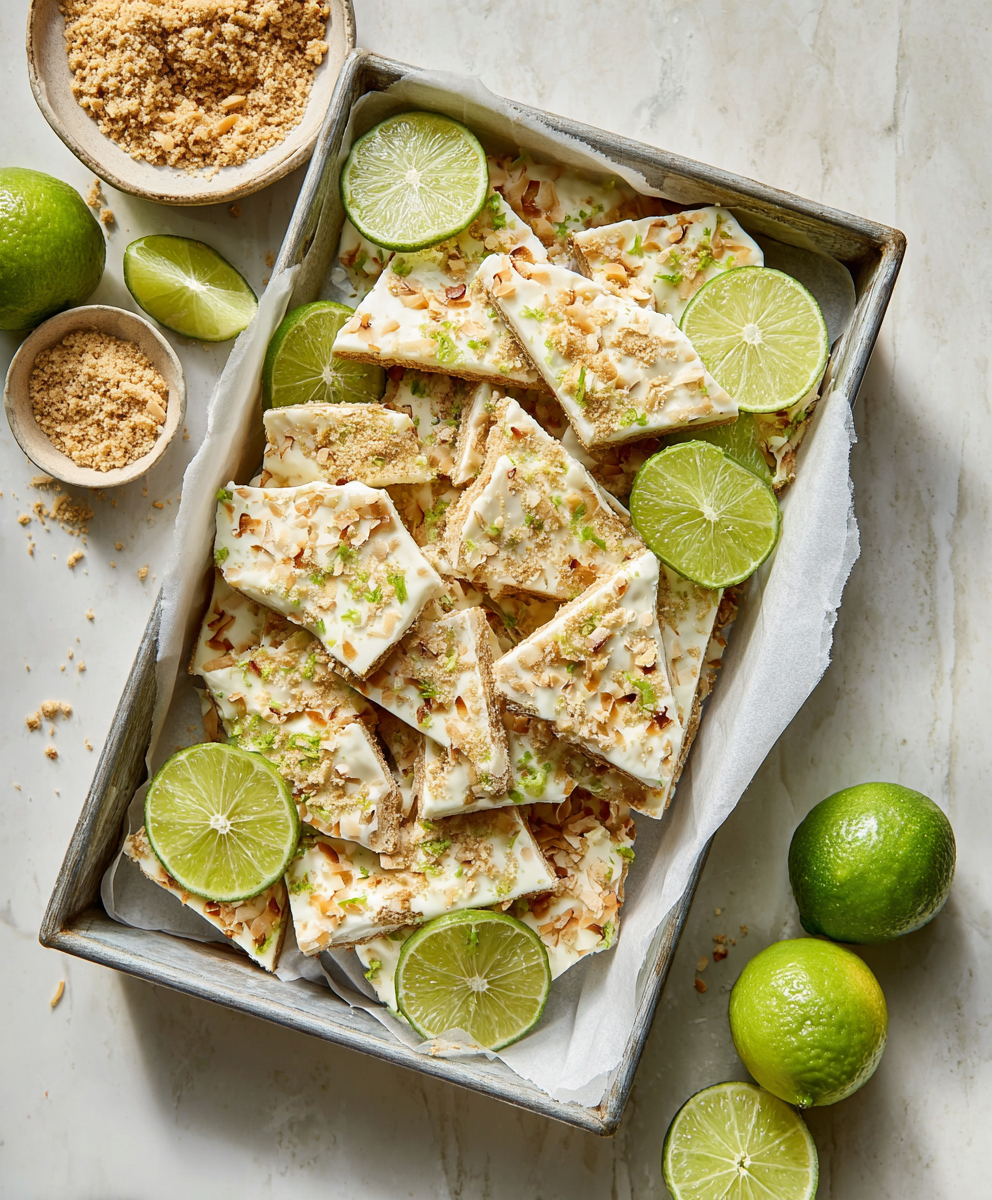
Key Lime Pie Yogurt Bark
A bright, tangy frozen treat that tastes like mini key lime pies. Creamy Greek yogurt, fresh lime, crunchy gluten-free crumbs, and toasted coconut come together for a protein-packed snack.
Did You Make This?
Leave a comment & rating below or tag @yummyhues on social media!
Rate This Recipe
Share This Recipe
Enjoyed this recipe? Share it with friends and family, and don't forget to leave a review!
Comments (1)
This recipe looks amazing! Can't wait to try it.
Comments are stored locally in your browser. Server comments are displayed alongside your local comments.

Hi, I'm Chloe!
What's Popular
30-Minute Meals!
Join to receive our email series which contains a round-up of some of our quick and easy family favorite recipes.